Using Cream Chargers and Cream Dispensers the Right Way
The Biggest Cream Charger Knowledge Base Online
In the last few years, the way whipped cream chargers, and whipped cream dispensers have gained popularity among professionals and enthusiasts is simply dramatic. Of course, there are some good reasons behind it! We believe then that you might be one of those enthusiasts and, therefore, have created this unique guide to teach you how to use cream chargers the right way.
So, if you were wondering what to do with your new kitchen siphon, better stay tuned to discover.

Cream Chargers and Cream Dispensers as Versatile Tools
You bought it, you’ve got it, but you do not know what you have in your hands? That ends today! The following lines will clarify the usability of a cream charger and cream dispenser in the food industry.
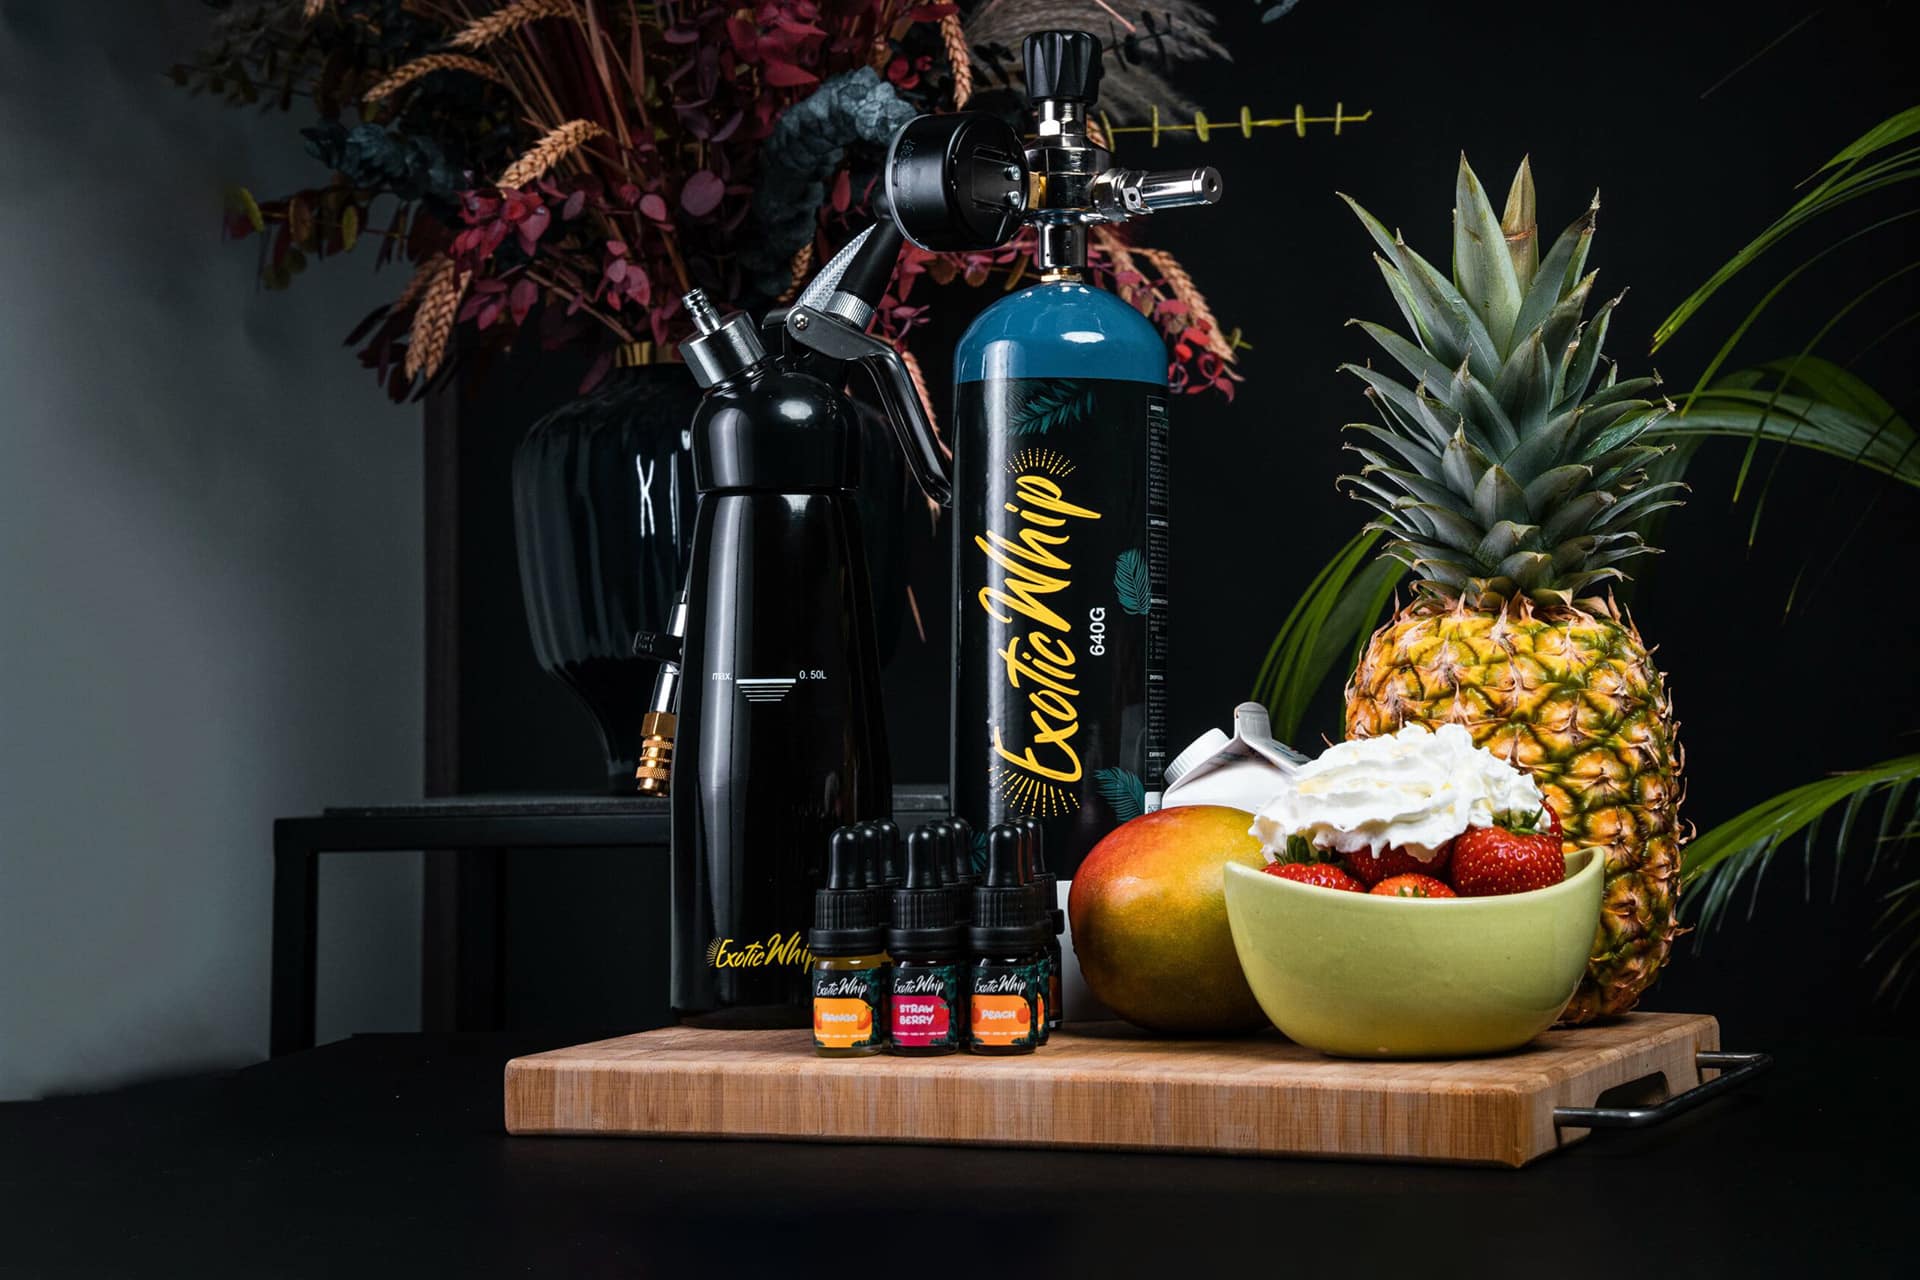
Cream chargers are specialized, food-grade stainless-steel containers in the form of cartridges or cylinders like ExoticWhip 670gr. These ‘bottles’ or containers contain, in turn, the pressurized nitrous oxide that is eventually introduced into a dispenser or cream siphon. In this last, we pour the mix to aerate, often whipped cream. But it doesn’t end up with whipped cream.
This method, to speak, saves you time and effort when preparing mixtures for cakes, desserts, or any pastry. That’s why, without hesitation, the popularity of both appliances has gone beyond imagined.
While making whipped cream is the primary function of these tools, their combo is much more efficient than you could think. On the one hand, you can use them to add texture to different components of savory and sweet dishes. On the other hand, these can help you prepare foams, mousses, sauces, cocktail infusions, and flavored cream with a particular volume in the peaks, toppings, etc.
Plus, delicate mixtures made using cream chargers can easily be stored for a longer duration in siphons without being exposed to air.
Guide to using a Cream Charger and Cream Dispenser – Step by Step
We just told you that a cream siphon needs pressurized nitrous oxide in the form of a canister or cream charger to work correctly. However, we have not told you just yet how this process works in real-time.
First, beware of how to deal with nitrous oxide. If you have cartridges, room temperature is not a big deal, but if using a cylinder or cream charger, try to keep it in a well-ventilated space. Nitrous oxide is non-inflammable, but when exposed to high temperatures, it can cause a fire.
Second, make sure to have your cream siphon and press regulator ready to use. Wash the cream siphon to secure no solid particles inside that can block the valve. Preferably with warm water.
Third, pour the mix into the dispenser.
At this point, we encounter two possibilities.
If you decide to use a canister or cartridge, insert the capsule into the cartridge holder and tighten it very well. You will hear a slight click that means the cartridge is pierced. This click should be your signal of ready-to-use.
Further steps are:
- Shake the siphon gently for a few seconds to let the gas binds to the fat molecules of the cream.
- Turn the siphon upside down and press the handle to release the aerated mix.
- Make the best out of it!
Necessary to know: Never unscrew the head of the dispenser while it is still charged (the capsule is still secured). Any residual gas in the bottle part must be released by pressing the lever before you start cleaning it again.
If you decide to use a cream charger, you need the press regulator.
How to Use a Cream Charger Step-by-step
For this second part, we begin with identifying the components of the press regulator: regulator, hose, and pressure-release connector.
Secondly, we check the components of our dispenser. It’s essential not to miss a piece!
As for the next steps, we continue to unscrew the siphon’s top part (head) and pour the mix into it. Please check that the head is attached securely to the bottle. The gasket (also called O-ring), another essential part of the siphon, should also be clean and well-placed on the underside of the dispenser’s head.
Tip: Never overfill the siphon. You won’t be able to get the best results otherwise.
- Step 4: Place the regulator on the cylinder’s valve and screw while checking for cross-threading.
- Step 5: Locate the hose and connect one side to the regulator and one side to the siphon on the cartridge deposit.
- Step 6: Make sure both sides of the hose are well-tightened.
- Step 7: Check on the pressure-release connector. It has to be secured on the siphon’s side.
- Step 8: Open the regulator. The gas will be released into the siphon.
- Step 9: Once you release the gas, you will hear the gas flowing into the siphon. As soon as the gas flow stops, you close the regulator.
- Step 10: Open the pressure-release connector on the hose (siphon’s side) and entirely disconnect the siphon.
- Step 11: Turn the siphon upside down and press the handle to release the aerated mix. It’s time to enjoy the magic made with nitrous oxide!
Safety Tips for Cleaning Cream Dispensers
We have come this far, and we can not let you go without offering some safety tips that come in handy when using cream siphons for the first time. Here are some:
- Avoid trying to remove or scrub the tiny gasket harshly on the pressure valve stick, as this may damage it.
- It would help if you didn’t use any metallic cleaners or abrasive cleaning agents to clean your dispenser. Do it with warm water.
- Never unscrew the head of the dispenser while it is still charged (the capsule is still secured). Any residual gas in the bottle part must be released by pressing the lever before you start cleaning it again.
Final Words
Now that you probably are more than just an enthusiast manipulating both cream chargers and whipped cream dispensers, it is the moment for you to dare to use these appliances the right way! Remember to always buy from reputed wholesale online sellers like Exotic Whip if you want a safe product and save time and money on your purchase.


